Wednesday, November 30, 2011

Christmas Tree Hunt

I have been so excited to decorate our first house for Christmas I could not even wait until Thanksgiving was over. I started bringing things out that night! Only a few days later everything was done. It just makes me cheerful to see all the decorations, and our tree turned out quite whimsical if I do say so myself. Here are some highlights from the tree hunt, putting up the lights, and new & old ornaments.


I love that my dad and T.J. matched. :-)

We never pass up a family photo op!

When we got home we went to work decorating. T.J. and I made a few new ornaments this year using a technique I saw on Young House Love (click to see a tutorial) - but my sister informed me my niece painted ornaments this way in preschool, so it is no new thing. :-)

T.J. made one that turned out looking like the Earth.


I stuck in some of my leftover pinecones (above) from my Pinecone Hurricane project. Also, the pink ball in the middle is part of a set of vintage ornaments my sister and I found at a flea market early this fall. 


This crocheted  snowflakes above were made by my Grandma. 
They are so beautiful and unique. 


Goodness I love glitter. :-)


T.J. and I were very excited to finally have a house to put some lights on! Here T.J. is up in our tree.
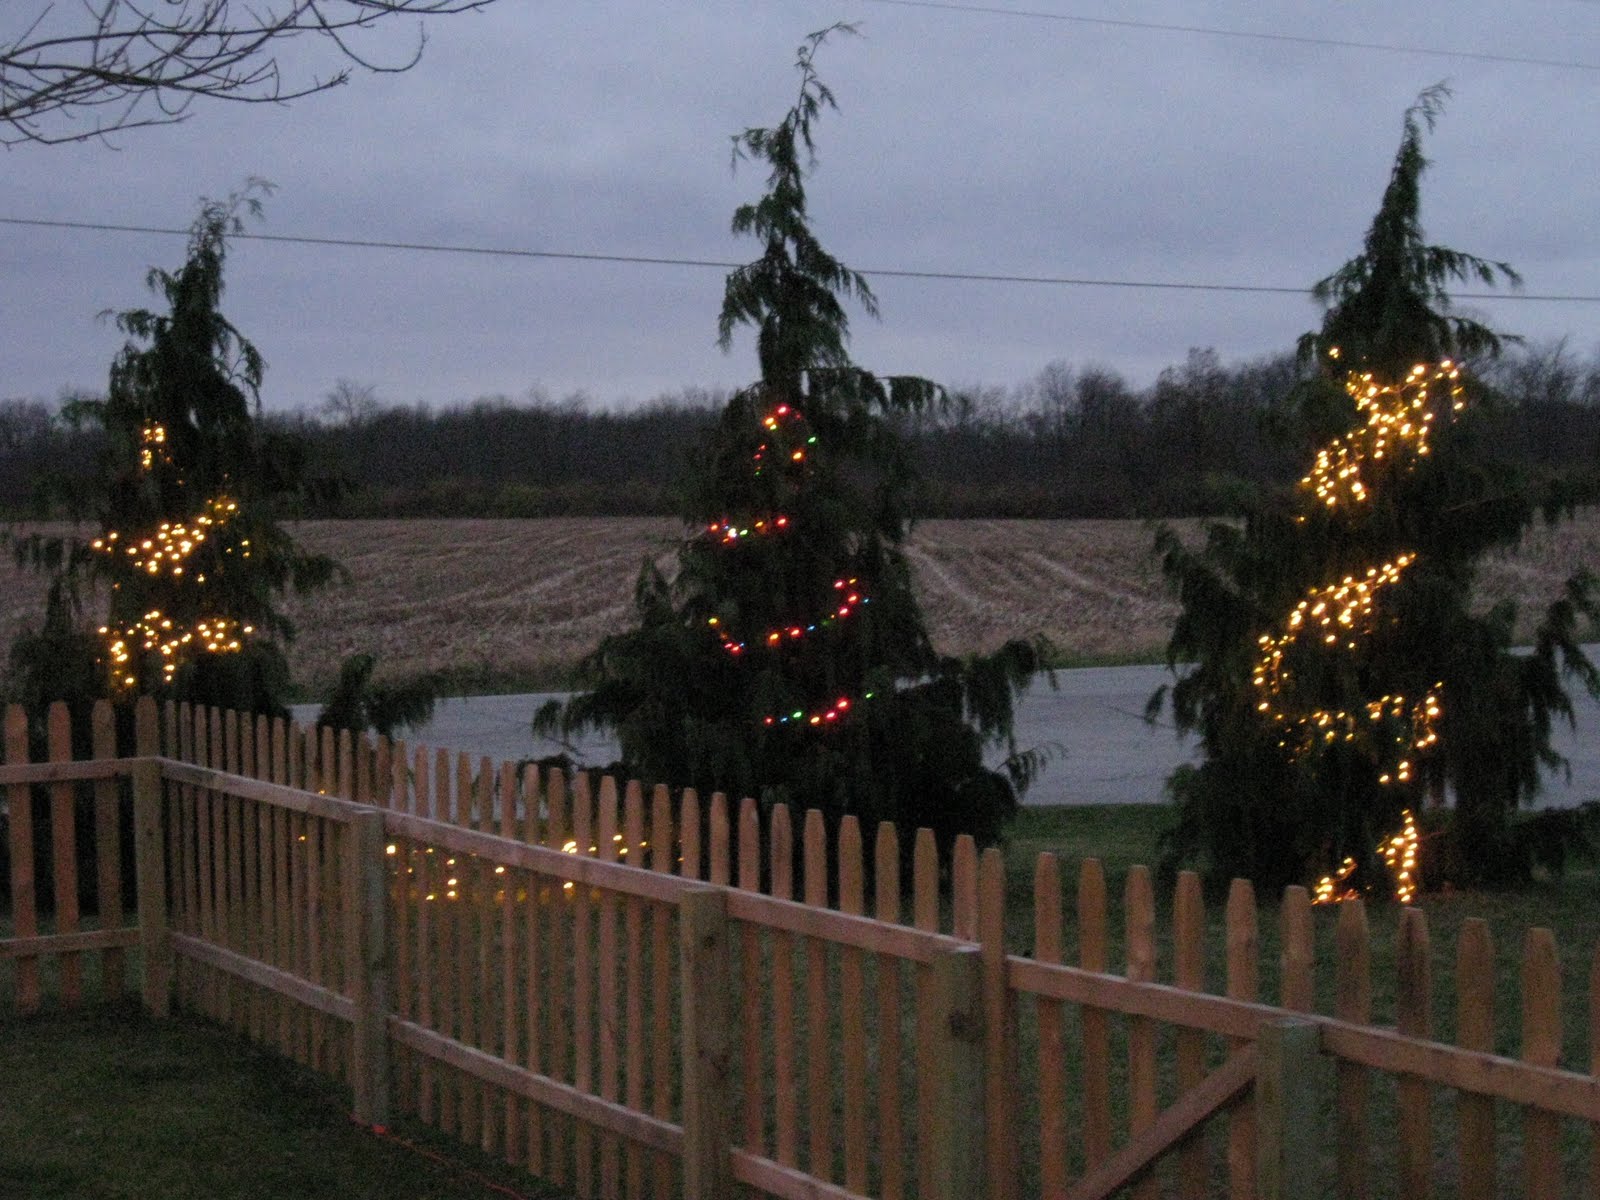
He also lit up the three pine trees out by our corner.


And in case you didn't notice, Hems & Haws has a new Christmas look! I switched from yellow to red chevron and changed the background and text of the header. The background is actually a picture of our tree this year, complete with pom pom garland. What do you think of the changes? Or of the tree? It just makes me smile. :-)


Monday, November 28, 2011

Fabulous Footstool


Last week I posted about my latest thrift store finds. This footstool was my favorite! I love that it has a secret storage compartment.


The fabric on the top and what I found under it was pretty gross. I am thinking there was a lot of old glue holding it together. It came off like black dust. I had T.J. make me a new wood insert for the lid because the old one was un-salvagable.


Two coats of primer, then 3 coats of Behr semi-gloss white paint. I bought the orange and white medallion fabric from Joann's on sale - I think it was $6 a yard, but I only used about half for this project... the rest may end up as a pillow or in a frame on my new gallery wall (pictures coming soon!).


The before and after again:


Saturday, November 26, 2011

Vintage Reindeer Jars

 
My sister made a few of these vintage reindeer jars for her booth and I think they are so cute! While I was at her house last weekend she made two more, one for me and one for her. I could not believe how easy they were to make. Check it out.

She used easy to find jars - sold at Ikea or Walmart - and slightly harder to find vintage reindeer figurines which you could find if you hunt a little at Goodwill or any other thrift store.


First she hot glued the reindeer to a sturdy piece of paper so he wouldn't fall over once he was in there. Then she glued that paper and the bottom of the tree to the bottom of the jar.


Sprinkle generously with glittery snow.


Last step, glue some hanging snowflakes to the bottom of the lid so they hang down and create a whimsical winter scene. Too cute!

Thursday, November 24, 2011

Pinecone Hurricane

Pine cones can be fabulous. Check out the picture (right), found on Pinterest, originally from here, of some beautified pine cones.
 
Wouldn't these be adorable in Christmas colors?? You are about to find out, and in my opinion, yes they would be.

As part of our Christmas Crafting weekend - Kate and I set out to spray paint some pine cones, with the help of my niece Shelby. She had an entire box of pine cones just hanging out in her garage, apparently waiting for this day. (this woman has one of everything :-))


I chose to do pink, red, and metallic silver, since it will be a pink, red, and green Christmas this year at my house. Kate did not have any neon green spray paint, so I brought back some extra pinecones to do once I got home.


Kate did red and blue for her house - here Shelby is helping paint some blue pine cones. They also match the awesome vintage ornament wreath she made the day before.

When I got home I could not even wait for the green pine cones to put them in my hurricane and see how they turned out. Adorable! But alas, the green was needed to break up all the pink/red goodness. 


The green ones turned out so cute. They look like little trees! I think I will do some extra in all the colors and make them into ornaments. 


Wednesday, November 23, 2011

Thanksgiving Table

I have been working hard on my dinner linens this past week. I made tablecloths, runners, and dinner napkins. It is going to be one heck of a patterned and colorful thanksgiving dinner this year! Check it out.


The best part is that everything I used to set my table was so inexpensive! I found the runner fabric in the red tag section at Joanns for $2 or $3 a yard. I thought it had a Thanksgiving feel to it but still incorporates the pink on the table and all the green and brown I have in my dishes. The napkins are made from red tag fabric too. I bought the napkin rings at Meijer on clearance for $1.50 per 4 piece set. In the center I used a plant that usually sits on the bookshelf and some pumpkin salt and pepper shakers I bought two years ago. The pumpkin napkin holder was a gift from my mom.


To go along with my colorful theme, I made place cards out of paint samples.


I also made a second runner to put on top of the bookshelf. Instant side board! I will put out all the appetizers here.

The "side board" is where I will display my THANKSgiving tree as well... details on the project here


Tuesday, November 22, 2011

THANKSgiving Tree


I believe everyone could stand to be a little more thankful in their lives. This year I decided I would ask our dinner guests to write down what they are thankful for and contribute to my THANKSgiving tree. I saw this adorable idea on Pinterest, originally from here, to make the list of things we are thankful for into a tree by stringing up the thankful notes on branches. I used my Cricuit to shape the paper the thankful notes were written on like leaves instead of circles like in the inspiration photo. Then T.J. and I hunted down some branches and stuck them in an old canister. I went ahead and wrote out a few of the things I am most thankful for to get things started...


Sunday, November 20, 2011

Mirror Transformation

Quick post today. Last weekend my sister transformed an ugly old plastic gold mirror into a bright cheery red one. So cute I had to share it. This project reminds me a lot of my own mirror transformation project, the fruits of which are hanging in my guest bath.

Read more about that project here.

The mirror she transformed was pretty similar. It did have the added challenge of an unremovable back. Unremovable without cracking the mirror anyway. My mirror simply unscrewed out of the frame. So instead she had to tape hers off.


Then she gave it a few even coats of Valspar red spray paint.


And now the mirror hangs in her booth. Pretty as ever. She appropriately named it "The Sassy Red Mirror". Ahh, aren't the wonders of spray paint bountiful?


Speaking of mirror transformation - I am getting ready to transform mine (see my latest thrift store find - a shapely hotel mirror here) but have not decided on a color! Any ideas? I am thinking black or white. Those options seem pretty boring though.
Related Posts Plugin for WordPress, Blogger...