Showing posts with label chandelier. Show all posts

Wednesday, May 29, 2013

Chandeliers of DC

I recently spent two and half weeks in Washington, DC. They don't mess around with their chandeliers in that city. They were breathtaking and I must have taken a million photos of them. I used to think the chandelier in my kitchen was big... I was wrong. See the highlights and what building they were in below:

First up: Chandeliers of the Capitol

This chandelier is in one of Speaker Boehner's conference rooms.


Another conference room in the Capitol - this room is for one of the committees.
These two win "most beautiful."

Chandelier in the original Senate


Next: Chandelier in the Mayflower Hotel


And: Chandelier in a meeting room at the Supreme Court

Notice the star shaped crystals on this one
 Next: Chandeliers in the State Department Reception Rooms


This Reception Room was set up for a diplomatic dinner.


Chandeliers in the National Gallery of Art

So this one isn't a chandelier -
but it hangs from the ceiling and it was pretty impressive!


And Finally: Chandeliers in DC Restaurants

Pizza Pi and Beer Chandeliers

Chart House bubble chandeliers in Old Town Alexandria, VA

Sunday, March 10, 2013

Fifty-Thousand Page Views Later

50,000 page views. Unbelievable!

When I noticed the blog was approaching this milestone I thought about what I might want to do to celebrate. When I started the blog I would request to go out to dinner for every small milestone. :-) I will probably be doing that for this one too, but I also thought it might be nice to reflect on the projects that have actually made a big impact around the house. We have spent nearly 2 whole years DIYing this house, and some projects have definitely been more important than others (ex: a spray painted napkin holder = low impact). So check them out below, in reverse order, the most life-changing projects on Hems and Haws to date:
See the original posts about each of these by clicking the links.

5. My Office
While this wasn't necessarily one DIY project, it came together pretty quickly after we moved in. This room features a hot pink table for a desk, light pink walls, and molding near the ceiling that serves as a shoe rack. (Latest office post)


4. Painting the Trim
The trim in this house was atrocious. I'm not sure what it is about wood trim that I dislike so much, but everything just feels fresh and clean with white trim. There are houses where wood trim looks nice, but this was not one of them. There are still 2 rooms in the house with wood trim, but I am hoping to tackle those this summer. It is not a quick and easy job to paint trim, but it is worth it!  (Tutorial here)


3. The Bar
The bar is the most functional project we have done. T.J. was a huge help, and we completed the project in just about one weekend. We use the bar every single day and it has really upped the quality of life in our house by providing another surface to work/eat/hang out at. (Bar posts one and two).


2. Five Chandelier Projects
What makes these projects the runners-up is that they make me smile every day. All of these chandeliers cost me $30 or less - one of them I got for as little as $4 at a flea market in Lansing, MI. (Posts: White Kitchen Chandelier, ORB Hall Chandelier & Bedroom Chandelier, Pink Office Chandelier, Pink Closet Chandelier)


1. Painting the Kitchen Cabinets White
We spend a ton of time in the kitchen and as they say - kitchen renovations = big bang for your buck. Here I am not talking literal bucks, although I do hope the improvements we have made in the kitchen will pay off. The whole kitchen feels lighter and brighter with the white cabinets and they are a more recent change (1 year ago). The combination of white cabinets with white trim and white doors just makes everything feel updated, clean, and new. If you are considering this project, do it! Read about my experience here.

Thursday, April 5, 2012

White Beauty

Check out the new addition to my kitchen!


 Many months ago I was  making a weekly run through Goodwill to see if there was anything I couldn't live without and I stumbled across this beauty. A gold two-tiered chandy (pic on the upper left above - but imagine it with two tiers). If you check out my house tour, you will see I already have 4 chandeliers in my house and really didn't have room for one more. Especially not a big one like this.
 
So I called my sister and asked if it would be crazy to buy this chandelier now, because it was an incredible deal (only $10!), and save it for 4 years until we buy our next house. She confirmed that it was crazy but I bought it anyway, determined to find a place for it. After we put in our new bar it was apparent we needed more light on that side of the room... and I had the perfect solution! The too big chandelier. I ultimately settled on painting it white instead of a fun bright color (like this one) because I thought it would be less imposing. I think it worked too. It is gorgeous, but is sort of camo'd with the ceiling. I rigged it up in the garage from a bike hook to paint.


Here is a peak of the gold it used to be. You can see here I stuffed all the bulb holes with paper towel to protect them from the spray paint.

 
Before I could start using this beauty some big changes had to happen. I didn't want to take down the fan that was already in the kitchen so I decided I wanted to convert this chandelier into one with a plug. Unfortunately, I am not quite DIY savvy enough to do this myself so I called in reinforcements... my dad. He went and bought a kit from Menards that was made for chandelier converting - it came with a nice white chain, the right wires and wing nuts, a cord with a plug on the end and more... all for $10. Bonus: it is called a "Swag" kit. :-)


Here you can see him taking it all apart to get to the middle - where the wires start and the new cord needed to be hooked up. Just remember the order you took things off - we had to put it back together again a few times to get it right.


Picture of the kit - definitely the least expensive way to go.
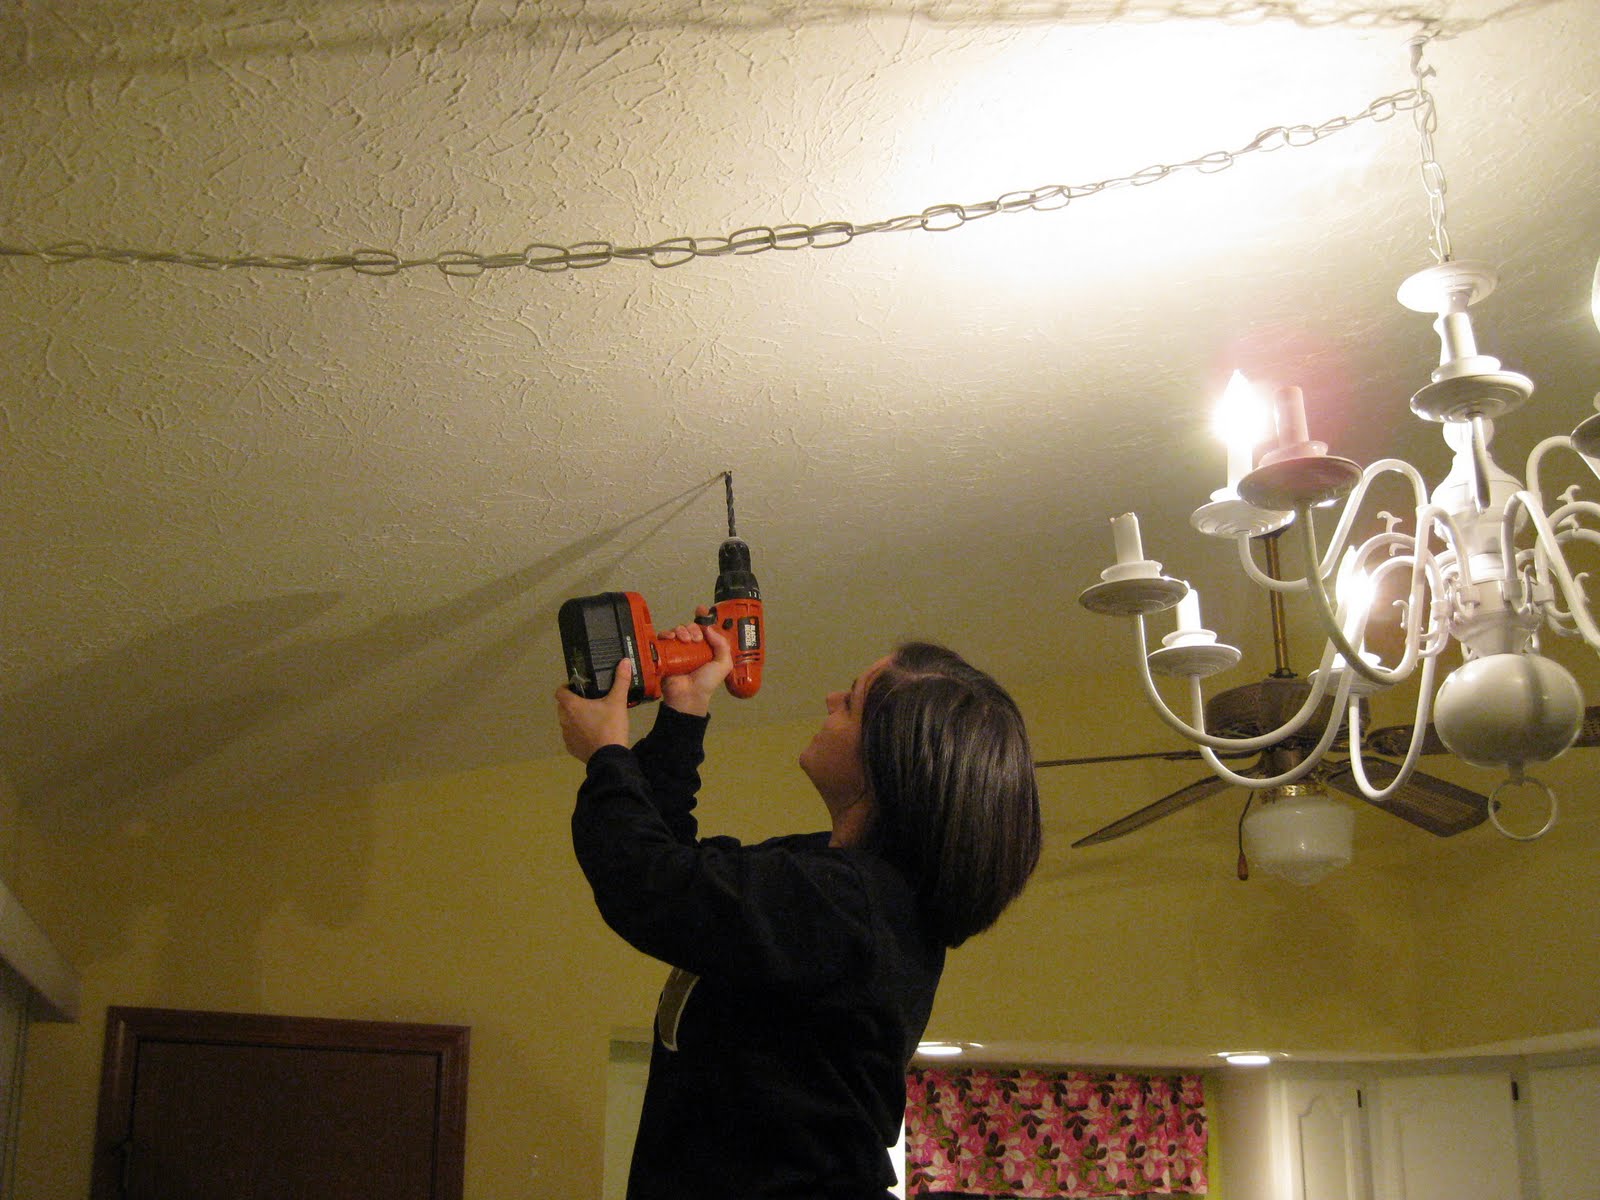
 To hang the chandelier I carefully climbed on top of my dining room table and started a hole. We bought a heavy duty hook to make sure it wouldn't pull out of the ceiling and make a giant hole/ruin my chandelier. Also in the picture below you can see that we played with hanging it over the bar (there was an existing hook there) but ultimately I decided it was too crowded and wanted it over the dining room table.


I had to do another coat of spray paint after my dad converted it to the plug - the process caused a couple scratches, but nothing that I couldn't fix with a little spray paint. Then it was time to hang and screw in all 12, yes TWELVE, bulbs. I bought 25 watt bulbs and it is still super bright! I also added a few crystals my sister gave me off a chandelier she rescued from a rummage sale a few years back.

Total cost for this project = $23
$10 - Chandelier
$10 - Light Swag Kit
$3 - Spray Paint


What do you think? Are 5 chandeliers in one house too many? What if they are all gorgeous?

Sunday, February 26, 2012

Closet Love

Back in November I picked up an interesting chandelier while thrifting with my sister. It was gold metal and had a milk-glass middle section. It was unique and cool (not to mention $4) so even though I had no where to put it, I snatched it up. It also had hideous glass lamp covers which I actually gave back to the thrift store people right at the counter.

Here I have the milk glass taped off.
Then it dawned on me. Obviously I need a chandelier in my closet! I was currently dealing with an awful florescent light strip - like the kind you sit under all day at school - which took a minute to warm up which drove me BONKERS. A chandelier was just what I needed. So predictably, I went with pink. And then went over the top with it and added glitter. Check out the process below - I got to spray paint in my sister's Dexter-esque kill room in her garage where she uses her paint sprayer to refinish furniture (she was painting the chandelier on the left for her office).


Milk glass revealed
 This chandelier also takes unusual fat bottomed bulbs. I think you can see this best in the picture above.


I used Martha Stewart glitter paint (also seen here) to add glitter on top of my spray paint job. It surprisingly stands out pretty well.


So about a month passed - and the glittery chandelier sat in a bag in my closet waiting to go up. I had an adorable pink rug, the perfect size for my closet, under the tree for Christmas (I may have done some of my husband's shopping for him) to complete the look. Or at least make a start at completing the look. I have big plans for new shelving in the future.


So after 2 more months... I finally convinced my husband to put up my chandelier as part of my Valentine's day present. I do feel like I should give him some credit here since we already have 3 chandeliers in the house - one of which he hung by himself (check them out here and here). I love it. It might be hanging a little low depending on how my re-shelving plan goes, but we can always shorten the chain. I also see some dangly beads or crystals in the future.


This picture is more true to color:


An awkward attempt to get the rug and the chandelier in the same shot:


I have also been working on another chandelier related project (my biggest yet) with my dad... details to come in a few days!
Related Posts Plugin for WordPress, Blogger...