Showing posts with label art. Show all posts

Wednesday, June 5, 2013

Historical Art

On my recent trip to DC I visited the National Archives.


The National Archives is where important documents like the Constitution, Bill of Rights, and the Declaration of Independence are kept. They also have a shop of course - and this shop had really cool reprints of old government advertisements, something like public service announcements but in print. In my opinion, the coolest ones were about food. Farming, healthy eating, etc. I looked for one that I liked + would match my kitchen.


This one is from the 1940's. Notice there are 3 categories for fruits and veggies. I love that at the bottom it says "in addition to the basic 7 (food groups)... eat any other food you want." Yikes! Oh how things have changed.

I think it looks good in my kitchen and draws out the green accents and yellow wall it is next to.


Monday, February 4, 2013

V-Day Quilling

This past weekend I had some guilt free craft time when T.J.'s family came to visit. Last year they must have come around the same time because T.J.'s little sister and I made Valentines together then (see them here). I asked if she wanted to make some again this year and she agreed, we even did a little bonus project.


I had been wanting to try this paper crafting technique called quilling since my mom got Martha Stewart's Encyclopedia of Crafts from my sister a few years ago. Well I snagged my mom's book with the intention to try it and now I finally have. I think the project turned out cute! And it was easy enough to be fun for kids.


I think quilling hearts is probably the easiest of the things that can be quilled - for example, check out this "H" I pinned awhile back. It is so intricate! But the hearts were fun and simple.

Martha's Instructions

We used kabob sticks and pens for a variety of sizes. 


Here's how Sophie's turned out.


And here is where my quilled paper art is currently living. I am contemplating how much better it would look in a white frame, so I may have to bust out the spray paint next.


I actually have surprisingly little Valentine's Day decorations for how much I love pink and glitter, but my collection is slowly growing! Last year I made this heart pillow. Card post coming next!

Friday, June 22, 2012

The Art of Dress(ers)

My poor husband has been using a podium shelf for a dresser for almost a year. When I saw a gaudy bright yellow dresser at Goodwill for $7, I thought I might know just the man who could use it. But the yellow had to go. I collected inspiration photos for what I wanted to do on the dresser for awhile before I finally decided to go with inspiration that was already in our bedroom - our bedspread.


Here's how the magic happened. Check out what the dresser looked like before:


When we took the drawers out to sand them we found this message inside:


Baby D - 1982. I have some 30 year old baby's dresser. :-) I actually really appreciate this little note. It makes me imagine an expecting couple out in their garage getting their new nursery ready - such a cute picture, until they chose this way overstimulating yellow. I wonder if that baby ever slept a wink. Where is Baby D now??


The knobs were all painted on so I had to knock them off with the end of a screwdriver. TJ had to fill some holes in the top of the dresser with wood filler to level things out.


I love the stark difference in the color comparison in these pictures. The gray is just so much more relaxing!


After the dresser was all painted gray (the same gray as the walls in our bedroom - Behr's Gentle Rain) it was time to make some artsy magic.


Needless to say I was very anxious especially when it comes to painting skinny lines. I took solace in the fact that the flowers on our bedspread look sort of wiggly and hand drawn so if it turned out awful I could just claim it was the look I was going for. I decided to just go for it and made a quick drawing of a flower on the bedspread to use as a reference as a drew the flowers out on the drawer fronts.


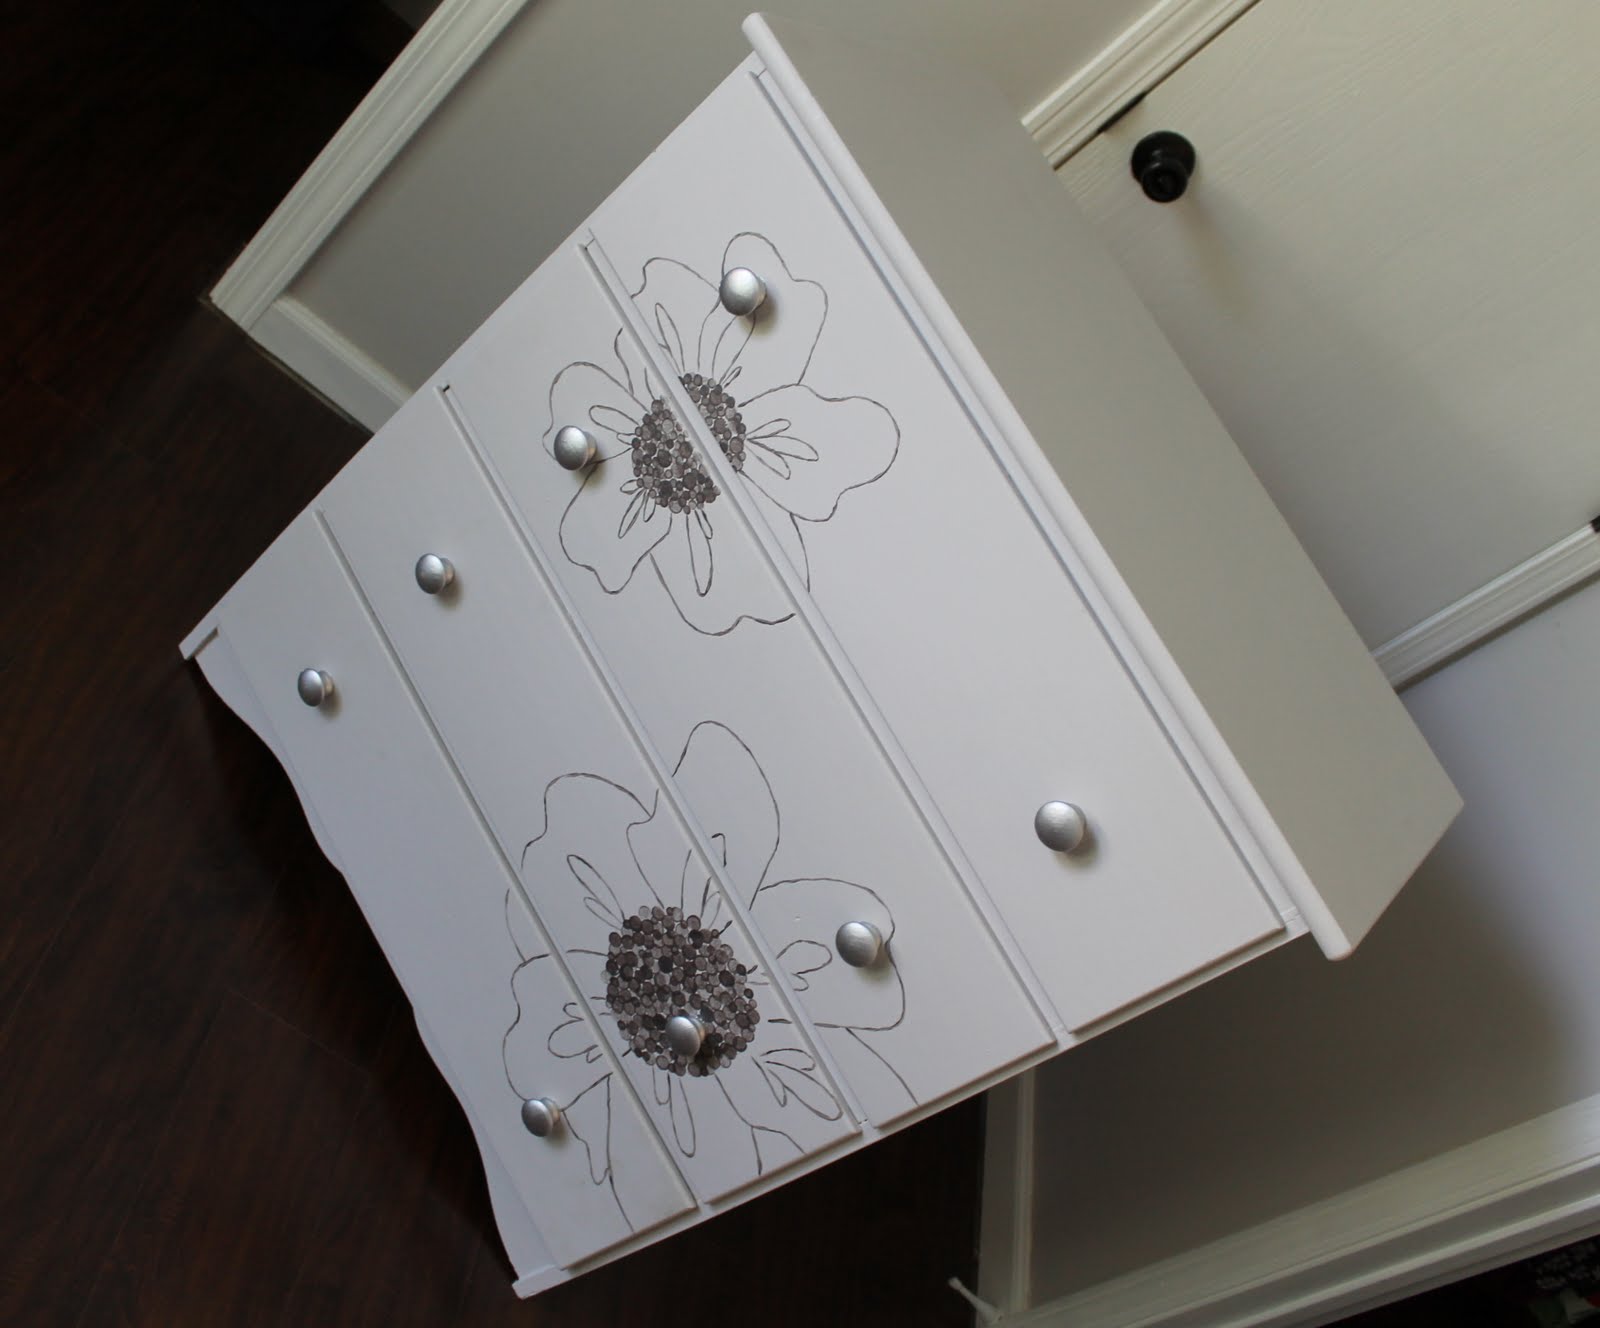
I used pencil first, then went over my lines with metallic paint and a skinny paintbrush. I used a polka-dotter (seen 2 pictures down) to make the dots in the centers.


The last step was painting the knobs and putting them back on. I used Krylon metallic silver spray paint to quickly cover them.


See the resemblance?


I think the actual drawers are much appreciated in TJ's closet - not to mention how much cleaner it looks to not have open shelves in there any more! And it sure looks good with that swanky new floor. :-)

Wednesday, June 6, 2012

Life Map

I have been wanting to make Map Art for a long time - since I saw this pin on Pinterest. Before I could start though I had to collect maps from 3 very important places to me - Michigan (where I was born, grew up, and met and married my husband), Charleston (where T.J. and I lived for 2 years and where we were living when we got married), and Indiana (where we live now, our first house, currently making memories, etc.). Michigan was easy - I drive by the welcome center there at least once a month. Same with Indiana - except most of the time I forget to stop there. I recently made a trip down to SC (see some pics here) but I was sleeping when we drove by the welcome center - so I had my mom stop by there. She was driving down separately about 4 hours behind us. So finally, I was ready to make my map art. I found this frame at Michaels pretty cheap - 50% off.


I made a pattern based on the pictures that come in the frame already 
and cut out each map centering the place that means something to us.


Viola! I may add a little something to mark where our house/apartment/college/childhood
 home is located, but I have not decided what yet. T.J. likes it the way it is.


The map art found a home in the guest bathroom - I had to move my awesome "Gone to Carolina" painting to a different wall. Still searching for the perfect frame for that painting...


What do you think? How many holes would your map frame need to have accommodate all the special places in your life? I wonder how many mine will need someday.

Monday, November 14, 2011

Christmas Gift Alert - Monogrammed Pillows

**This is an alert because if you are a family member reading this post, you may be spoiling your Christmas gift. :-)

I have had a button art trend going on lately - check out a few of my latest button art projects:


See the posts about each: Wreath, H Monogram, Tree Painting

The picture on the upper right is my latest, and I made it as a gift for my grandma's birthday last week. The inspiration for this project comes from here.
My grandma loves pink - some might argue more than I do... but I don't know if that is possible. She is definitely who I get my pink obsession from. It runs in our blood! Anyway, I knew I wanted her gift to be pink... but not pink on pink. So I went with pink fabric and purple buttons.

To start I picked out the "M" I wanted to use (M is her first initial). I just typed in an M on Word and changed the font til I found one I liked.Then I increased the font size until it was almost the entire page.


I printed it and I cut it out to make a template for my pillow. For the pillow I just found a piece of pink fabric I liked and cut it out in a rectangle shape. I ended up using stuffing to fill it. I rifled through all my buttons and found enough purple to fill in the M shape nicely. Because buttons are round and the M has pretty straight lines, the buttons will not fill in the shape completely.


Then I set to work sewing them on. This is no easy task. In my post about the Button H I scoffed at how much people on Etsy were charging for these pillows... I scoff no more! It took me at least 3 hours to sew on all these buttons. Here are a couple progress shots.


And finished!


I think Grandma liked it!


This post is linked up with Sew Woodsy's Link Party and Southern Lovely's Link Party.

Sunday, November 13, 2011

White and Light

About two years ago I purchased three reproduction prints from Michaels to hang in my sewing room "someday". I recently decided that day had come! Since we moved into the house I just had the pictures leaning against the wall on my table (as you can see below) with the intention of hanging them on the wall above them. Since frames cost so darn much money (especially big ones) this project had been put off. Then I decided to think outside the box. A few weeks ago I purchased a cheap $5 frame from Walmart for my monogram button project (see it here). I thought... heck, it might be the right size for my pictures with their mats. Turns out it was. I booked it right back to Walmart the next day to buy 3 more.


The frames only came in black or wood so I opted for black and put my pictures in the frames. I wasn't loving it. I had originally pictured them in white frames and I guess my brain was just stuck there.


So I decided to give spray painting them a try. I laid out this drop cloth on our back patio because while I was at it, I thought I'd spray paint a few other frames I have been wanting to make white for my future gallery wall.


I decided to prime them first for added durability. Turns out painting frames takes a LOT of spray paint. I only finished the three I first set out to do and will go back to do the rest with another can or two.


These others just ended up seeing a few coats of primer.


Here they are up on the wall in their rightful place.

 
I like the white so much better than the black. Any thoughts?
Related Posts Plugin for WordPress, Blogger...