

Mine ended up turning out a little different, definitely with more flair. I decided to try and use fabric I already had rather than go out and buy new hot pink. I had plenty of pink in my stash but not many of the pieces were long enough to make full curtains out of. I had originally purchased this pink and black polka dotted fabric to make a vintagy holiday dress. It was sad for me to come to terms with the idea that this fabric would no longer be a flashy 50's dress. Someday maybe I still will make it into my dream dress :-). To make the curtains I simply cut my fabric in half lengthwise (or hot dog style) to make my two panels.

First I had to get rid of that ugly selvage edge. I used my serger to cut and finish it at the same time, but cutting it off, turning it under twice instead of once like I did, and sewing it would work just as well.


After serging all four edges of each panel, I turned them under once, ironed them down, then stitched them with a narrow hem all around. Next, I had to start measuring. This is the part that makes me nervous. No need to be though, as long as you measure twice and cut once! I can't tell you how many times my mother has told me that.

Because I already had my curtain rod I just folded the material over the top of it to see approximately how far to turn the top edge down. I decided two inches would be plenty.

Then I stitched just shy of two inches from that edge to make my casing for the rod to go through.

Next I decided I needed to hang the curtains up to see how many inches I needed to hem up the bottom so the panels would fit the window length. First I had to wrestle with the hardware, but I got the curtain rod up, all by myself! In true fly by the seat of my pants fashion, they were a near perfect length. I ended up just hemming them a regular 1/2 inch.

(This is my "I'm so proud I got these up all by myself" shot)
The panels were gorgeous all by themselves at this point...

...but I decided to stay true to my inspiration and give them that little something extra. I played with the idea of just sewing on ribbon strips or possibly trim to create the striped effect, but after looking at the ribbon and trim at the store I decided, what the heck, I should go for it. So I purchased 1/4 yard of black satin I planned to cut into strips, gather, and sew onto my panels. Even though I bought decent quality black fabric it still cost me less than buying ribbon because I bought such a small amount of yardage.

I did not want to have to hem all the edges of my strips so I used these handy dandy pinking shearers I picked up at a garage sale for $1 to finish the edges. Since these curtains don't need to be super durable the finish should hold up. I just cut the black fabric into four even strips as long as the fabric would allow.

Next I set my sewing machine to a longer stitch to create the gathers.

I made sure to leave the thread long at the end of my stitch so I could grab onto one of them and pull to create a fuller gather.

I ended up with this:
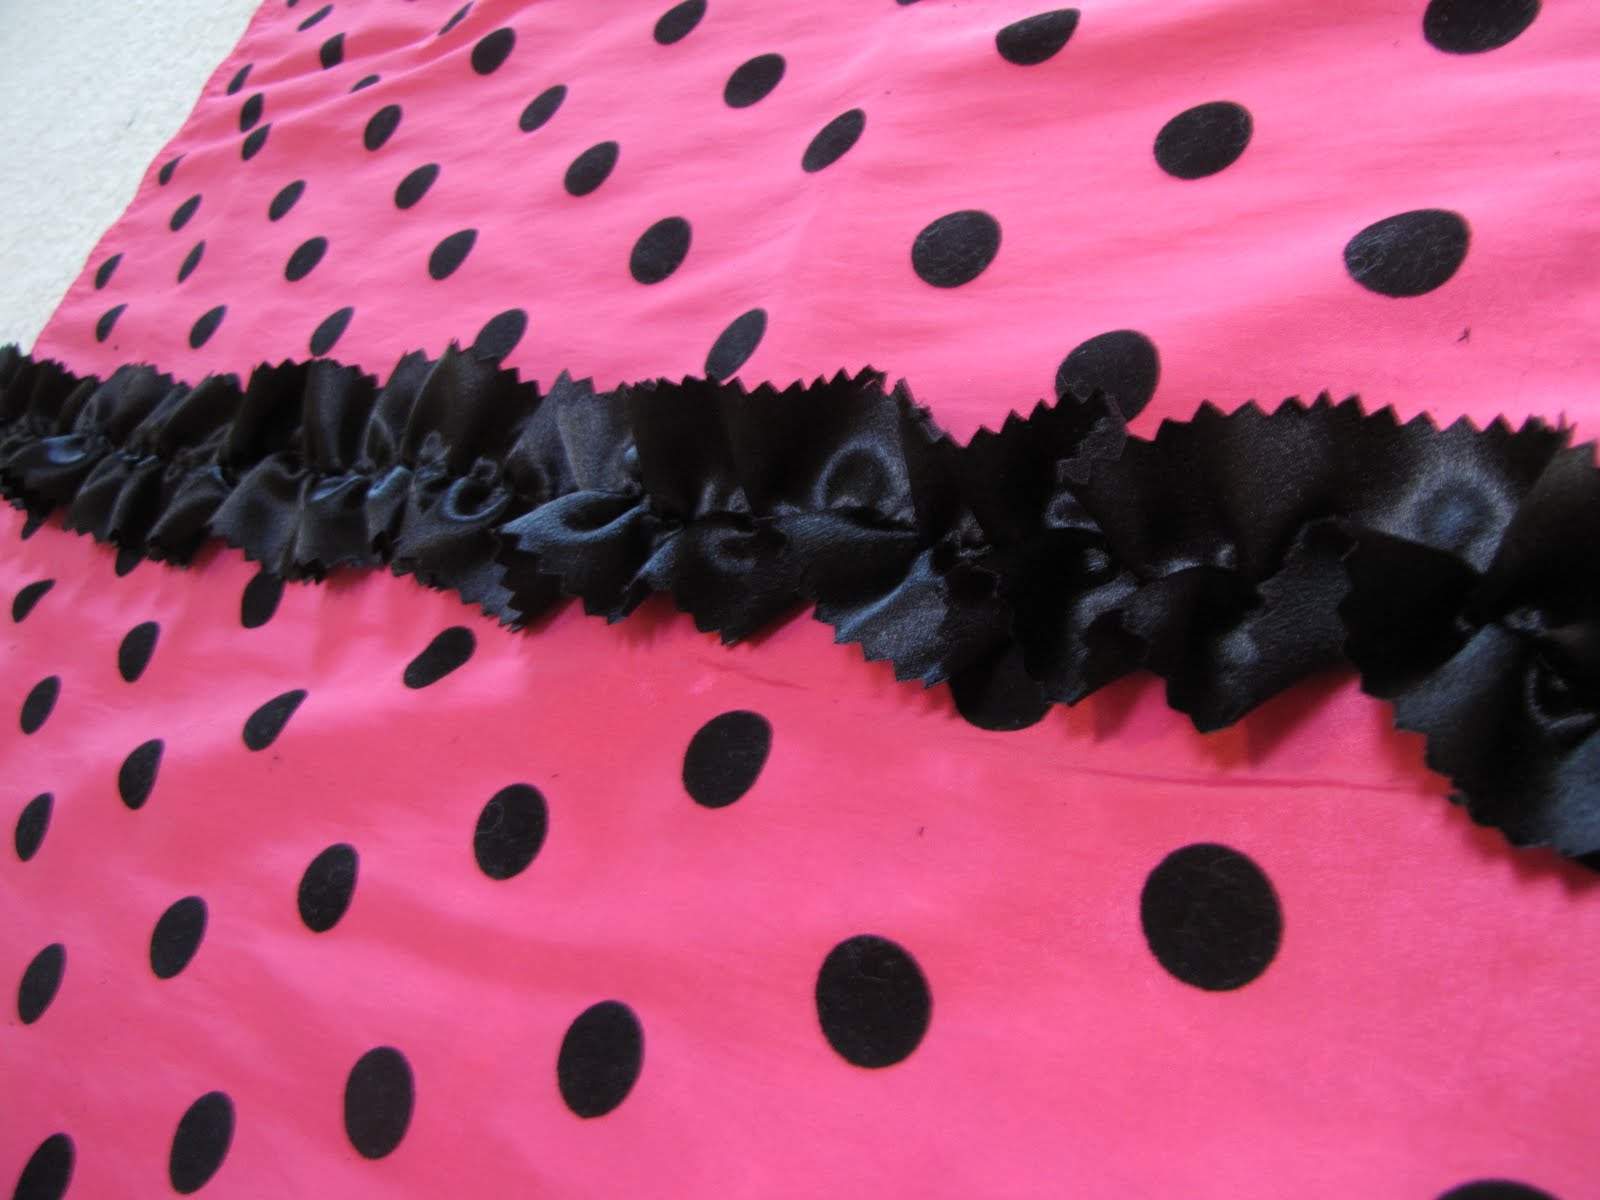
Looks kinda like lasagna mixed with bow tie pasta or something doesn't it? The whole polka dot pattern gives it kind of a circus feel I think, hence the name of the post. The ruffles kind of remind me of clowns. But mostly I just think it is cute.
So I gathered and gathered until I had all four done. I pinned them on to my panels measuring up from the bottom to make sure they were even. Lots of pins are key to gathers, otherwise things can get crazy when you get to the sewing machine.

After I sewed on my strips, I folded the ends over the edge of the panel, and sewed them in place. Then the curtains were complete! I hung them up and am enjoying them now.


1 comment:
So cute and great tutorial!
Post a Comment