Wednesday, December 26, 2012

DIY Recyclable Shopping Bag

A little over a year ago, before our big Black Friday shopping outing, my sister gifted me a super awesome reusable shopping bag from Gap. It is nylon, light, and small enough to fit in my purse. I try to use it everywhere I go so I don't come home with a bunch of bags I am just going to get rid of. It also held a heck of a lot more than would fit in your average Forever 21 or Old Navy bag. When I was shopping for fabric for a different Christmas gift I was making I ran across this adorable fox fabric at Joann's. My sister and I had just had a conversation about how foxes were going to be the next chevron and the fabric almost perfectly matches the way her basement is decorated. So I had to get it. I had also noticed that she used her Gap shopping bag a lot, and maybe needed another one.


Above is the finished product - and how you would stick it in your purse. 
Below is what it looks like opened up.


And how it folds...

The secret is this little pouch attached to the top hem of the tote bag. 
It allows the whole thing to fold into itself and become discrete. 
I just used the one she gave me last year to engineer the pattern for this one.


Monday, December 24, 2012

Admit One


I made this Admit One ticket holder for my musical-loving sister for Christmas. I think I might need to make myself one too. I realize it matches absolutely nothing in her house, I just don't care! It was too cute not to make. Good luck finding somewhere to put it Kate!


I actually got the idea from another blog I read, written by a crafty old friend of mine I went to school with. Check out her inspirational blog here, and her Admit One project here. Like Ashley, I went hunting for shadowboxes at Michaels. They were having a crazy good deal that day, so I picked up a plain black one, about 8x10. I also searched around for theater-looking letters and background. I found the most beautiful piece of scrapbook paper for the backing - it is textured and glittery and inky black. I just glued it right to the back of the frame with hot glue. Then I added some shiny textured letters, securing them with hot glue as well.


For fear she would open the gift and have no idea what it was for, I took some old tickets and taped them together to put in the box. They are not musical tickets (because those are for my own scrapbook) but they are WMU tickets, which I thought would be funny (my sister went to WMU's rival school). Go Broncos! 


I also learned it is incredibly hard to take a picture of a frame during this project. 
Any tips out there? Yikes!


Wednesday, December 19, 2012

Gray Kitchen!

This week I broke down and did something I really did not think I would do... I repainted a room in my house. I always thought that once I had the house set, and had painted the walls I wanted painted, I would be content. I should have known better...


I do think it is fitting that the first room to be repainted is the room I painted first when we moved in.


So now it is gray. A big improvement I think! There was just too much green in there before. Now it feels a little older and more sophisticated.


The room has come a long way... here is a comparison with a couple weeks after move in. Since then we painted the cabinets and updated the hardware, and now we have switched out the paint color and updated all of the plugs and light switches.


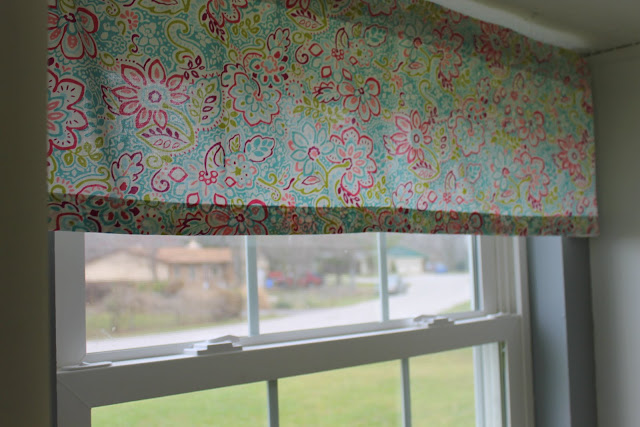
I also made a new valence. I did a tutorial for the curtain that was there before.


I think the gray really makes the white cabinets and trim look sharp. 


Today T.J. and I celebrated our Christmas a little early. I love this crackling fireplace "movie" on Netflix. It really set the mood! If you want to read about T.J.'s gifts, he is writing about them on his own blog today. Read about them here.

Friday, December 14, 2012

Put a Bird on it Christmas Cards

Is "put a bird on it" dead yet? I hope not. I still love putting birds on anything, but I hear foxes might be next. :-) In case you've been living under a rock, here is what I am talking about.


I was inspired by this idea on Better Homes and Garden's website, but made a few tweaks of my own. For example, I used felt to make the trim on the Santa hat, to add a little dimension. I also used flannel on some of the fabric wings so they were fuzzy. The cards were pretty straight forward to make... but they made a big mess. Check out the Christmas card making frenzy below. There are step by step directions on the BHG site if you are interested.


I even got T.J. to help with some of the gluing and cutting - and drawing on the eyes. The artwork you see in the eyes was all him. ;-)


I almost forgot to mention the best part - I made these cards for free! I just used what I had. But if I had needed to purchase the materials, I would estimate it would cost less than $5 for the whole set (I made about 25). You just need a pack of white, green, and red paper (around $3), 1 sheet of white felt (30 cents), fabric for the wings (less than 1/4 of a yard), and a marker!


Who doesn't love a good Christmas bird?

Wednesday, December 12, 2012

Super Easy Dog Bed


I have been wanting to sew a dog bed for awhile now. I ran across some adorable dog fabric at Joann's the other day and decided it was time. 

I knew I wanted a pillow that I could wash, because let's face it, dogs can be dirty. :-) The kind of dog beds they sell in stores are bulky and hard to wash, so I went with a different approach.


It is just a $3 bed pillow from Walmart, plus a homemade pillowcase! And it took me all of 5 minutes to complete. I just took my 1 yard of fabric, folded it hamburger style, sewed up 2 of the sides (right side of the fabric facing in), turned it inside out, folded down the remaining opening, and sewed around that like a hem. 

I can easily remove the pillow case, wash it, and put it back on - or change it to something different! I know the white background is a risk, so it will most likely be retired someday, but for now it is super cute and Lexi seems to like it. :-)


Merry Christmas Lexi!

Monday, December 10, 2012

Woodland Creature Christmas

This Christmas I let Martha and Target inspire me. 


First, I I found these adorable reindeer ornaments at Target and decided I would do a gray and red Christmas this year. (Silhouette pillow tutorial here)


Then I saw Martha's spread on her Woodland Christmas
...and it all came together.


I made these felt animal cutouts using the templates on Martha's website. I added a few of my own too, including the fox and the moose by simply searching "fox silhouette" on google and scaling it to size in Word. 


I had to give the below ornaments a shout out too, since my dogs are my real-life Christmas creatures.  My sister and family made these of each of our dogs after we ate Thanksgiving dinner. Eclectic, yes, adorable, yes!


Here's the rest of the deco... can you spot the creatures hiding throughout?


Applique Moose Pillow


 Top shelf: Woodland creature ornament from Michaels. Middle shelf: Reindeer jar (tutorial here).

Saturday, December 1, 2012

Reindeer Silhouette Pillow


I made this reindeer silhouette pillow for my sister this year for her birthday. I think it turned out pretty cute. :-) She does not follow any rules when it comes to Christmas colors - so this grey and blue reindeer pillow will fit right in with her holiday decor.

To start - I found a silhouette I  liked by searching Google Images, copied and pasted it into Word, blew it up, and printed it out. Then I cut around it, pinned it to some felt (30 cents a sheet at Joann's), and cut around it again. Cutting the antlers out of the felt was a bit of a challenge, but not too bad.


Then I cut out my chevron fabric (Hobby Lobby) for the pillow and before sewing the two pieces together I sewed on the reindeer silhouette. This was a bit tricky as well, but with lots of pins it isn't too bad. I just used a simple hand stitch to attach the felt to the fabric - you can see my stitches clearer 2 pictures below.


My own Holiday decor is a little more traditional - the silhouette isn't sewn onto this pillow yet, but soon!


And because it is December 1st - I thought I'd share our Christmas lights this year. I put them up all by myself! It was a harrowing experience, but I survived.


Related Posts Plugin for WordPress, Blogger...