Showing posts with label fabric. Show all posts

Friday, January 17, 2014

Surprise!

My sister turned forty this year so naturally we had to do something special for her. My sister in-law, brother in-law, and I had been cooking up party ideas for a few weeks when my sister insisted she was throwing her own party.... on the same night as the surprise party we had planned! We decided to let her do it, and the surprise would just be all the extra people we had invited.


She wanted a wine and cheese party and I wanted a retro theme and we ended up with a good mix of both. When I arrived at her house a few days before the party she had some of the set up done already. When I saw the napkins she had picked out I thought she must know about the surprise - because they perfectly matched my invitations! Old pictures and blue and white polka dots. A crazy coincidence - or maybe it speaks to our special sisterly connection.


Her house always looks bright, cheery, and ready for a party.


Dessert table complete with a chocolate sampling bar!


Everyone brought at least one bottle of wine so we had quite an assortment to taste. I put pictures of Kate in her "younger days" out on the tables.


 I made Kate a sign out of a dowel, ribbon, fabric, felt, and hot glue (but I didn't make her wear it all night :-))


I also emailed all the party guests and asked them to send me old photos and a message to Katie. I compiled them all in a Shutterfly book (pictured above).
  
Cute 40th birthday gifts (below) - "40 sucks" and "40 is sweet" from her guests.


Cheers!

Saturday, January 4, 2014

Easy Knit Dress

This dress is an incredibly easy Friday night/Saturday morning project.


Working with knit can be a challenge, but this dress was so straightforward and simple it was hardly a problem! I used McCalls 6886 for the pattern and the purple and black houndstooth fabric is from Joanns (I think). I used about a yard and a half. It took me a couple hours on a Friday night to cut it out and get it started and about an hour more Saturday morning to finish it up. It doesn't get better than that for a new dress!


Wednesday, November 27, 2013

Ruffle Bum

I have always been taken by things that are small. Baby clothes are no exception. I was so excited to hear that friends of ours were having a baby... for the sake of having a baby, but also because I knew it would give me an excuse to make them something. I was even more excited when I found out it was going to be a girl! The only tough thing about it was picking out which pattern to use. I ended up going with an "It's so easy it's Simplicity" pattern (A1826).


If you need to make a Christmas gift for a baby, I definitely recommend this one. I had to stop myself from making 5 more and hoarding them away in the closet for my own future offspring.


The process was pretty simple - you need just a little bit of fabric, bias tape, and skinny elastic. There is elastic around each leg and the waist. The ruffles were easy to make - this is where I deviated from the pattern a little. The pattern suggested having a raw top edge on each ruffle and covering it with ribbon. I assume they proposed this because making a tube out of fabric and turning it around is time consuming, but I just made fabric tubes (by cutting long skinny strips of fabric, folding them hot-dog style with right sides together, and sewing along the long edge), turned them right side out, and used those to make my ruffles. That way the top edge was finished. You can see the gathering but I thought it looked better that way than with oddly placed ribbon along the top of each ruffle. Below you can see my stitching lines for each ruffle and how the bias tape was used to make a casing for the thin elastic around the waist.


Such a fun little project! Sorry I do not have a picture of a baby actually wearing the diaper cover... I will work on that!  


Tuesday, November 12, 2013

Tuesday, October 29, 2013

Bench Recovery

While on my project kick this weekend adding storage to our laundry room I got around to recovering the bench that lives in the front hallway. I have been meaning to recover it for awhile, especially since I dropped a paint edger on it face-down (oops!) and got a big gray rectangle on the fabric when I was repainting my office. I absolutely love how it turned out. Something about how the white and gray fabric makes the brown wood parts look like dark chocolate looks so chic! The old cream and orange fabric brought out more of a warm chocolate color. You can see what the bench used to look like before and after I recovered it a few years ago here (and below).


Recovering a bench is CRAZY EASY. It took me all of one hour to recover this bench in two different fabrics. I did a white layer first to make sure the old fabric didn't show through my new fabric.

Here's the bench before... notice the gray paint on the upper right!
The first step is always removing the bench seat from the legs. This step should be very easy. Just flip the bench over and unscrew the top (should be 1 screw located near each leg).

My next step was to find some white fabric to use as a barrier from the old fabric to the new fabric. I tested it first and knew the old would show through the new.  I simply laid the fabric out and eyeballed how much I needed by laying the bench seat on the fabric and cutting about 4 inches extra all around it.


Next, basically wrap the seat like a present. Pull the fabric really tight and staple it in place on the four straight edges first, then fold in the corners and secure with more staples. I repeated the same process with my new patterned fabric. I was careful to look at the printed side first and decided which part of the pattern I wanted to be centered on the bench.


Reattach the top to the legs, and viola! New bench:


Monday, July 29, 2013

Wedding Shadow Box


3 years later, I finally got around to making the shadow box for my wedding. I wanted to make one of these from day 1 because I knew I wanted to frame the pattern for my dress somehow. I have written about the wedding on the blog before (here, here, and here) but long story short, my mom and I made my dress and I made my reception dress (pics below) so I have the pattern and various scraps of lace and fabric that I wanted to preserve. I also saved a few other odds and ends to include like my "something old" and "something blue" - a vintage bow hair pin from my sister, and two charms from a bridal charm bracelet from my sister. I included the wedding invitation and a pink bow from my shoes too.

I adore the shadowbox I found, definitely the cutest one I've ever seen. I found it at Michaels for just $20 (after coupon). To attach my fabric, lace, etc. I use the pins that were already in the shadow box plus a couple corsage pins I already had. The only thing I ended up taping in was the wedding invitation because I didn't want to put a hole in it. I also ended up taking the physical pattern out of the pattern envelope so it would be less bulky.

Click the photo below to see it larger.


I included fabric from both my dresses (below). 


I love being able to look at this stuff that reminds me of that day + the year of planning leading up to it. We spend so much time and energy on wedding planning and then so much of it gets stored away in boxes and never sees the light of day again. I am glad to have my wedding memories out on display now!

Friday, July 26, 2013

Easy Tufted Cushion Tutorial


I have had these ice cream parlor chairs for a year or so and there was something just not quite cute enough about them... well I remedied that with these adorable tufted round cushions! I really had no idea how to tuft cushions so I just went for it in the way that made the most sense.

But first, I made the cushions. I found this fabric at Joanns and I thought the pink would match the front door pretty well. I want to say I spent about $7 or so on it. I bought half a yard and it worked... but it was a little tight. 3/4 of a yard would have been better. To get the round shape I took various sizes of plates outside to the chairs to see which seemed to be the right size. In the end I didn't have anything quite big enough so I ended up cutting about 1 inch extra around a large pasta serving bowl. In retrospect I should have cut them a little bit bigger than that because once I stuffed them they poofed up and were a little smaller than I had intended. The tufting did help with the poof though.


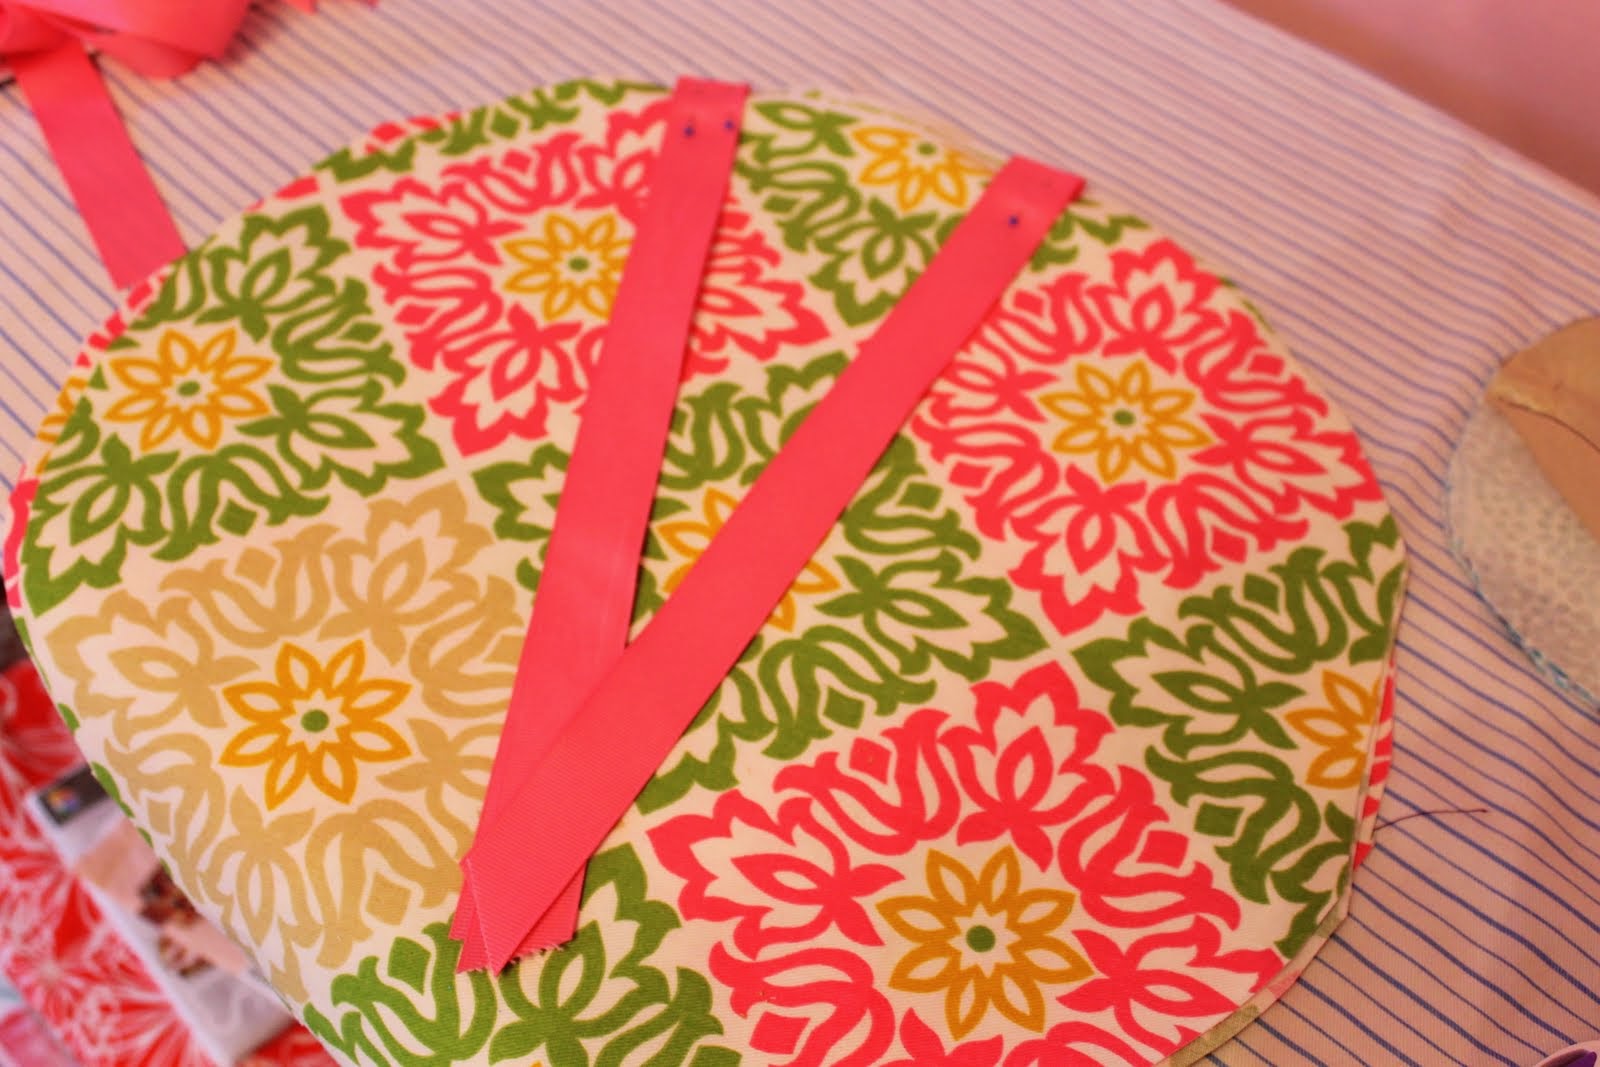
I picked some ribbon and laid the fabric circle on the chair to see where the ribbon would need to go in order to tie around the metal back of the chair. I pinned the ribbon in place on the right side of one circle (x2 for the other chair).


Then I simply put right sides together and sewed around the circle leaving the space between the ribbons open so I could flip it, stuff it, and sew it up when I was done.


After I stuffed them they looked like this (below). As I said, a bit poofy.


So then I tufted them! I picked 4 spots (the corners of the green medallion here) and went for it. I just tied a big knot in my thread and started from the back. I pulled really tight and went back through about 1/4 inch from where my needle came up and repeated that step 5-6 times. Sometimes I pulled the thread and knot right through the fabric but I just started again if that happened. I think this would have been even easier with small buttons because then the thread would be less likely to pull through plus it might have given an even more finished look to the cushion.


I think they turned out pretty cute! The porch looks more finished and I have an added pop of color. Definitely better than no cushion. 

... and they made for a nice prop in this recent anniversary pic.

Related Posts Plugin for WordPress, Blogger...